2 Meter, 6 Element Cross Yagi Antenna
Photo 1
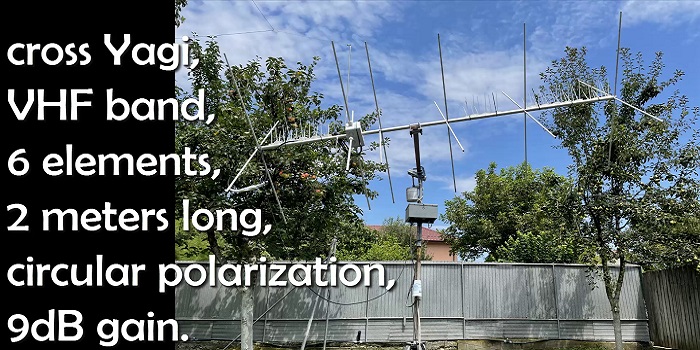
Photo 2
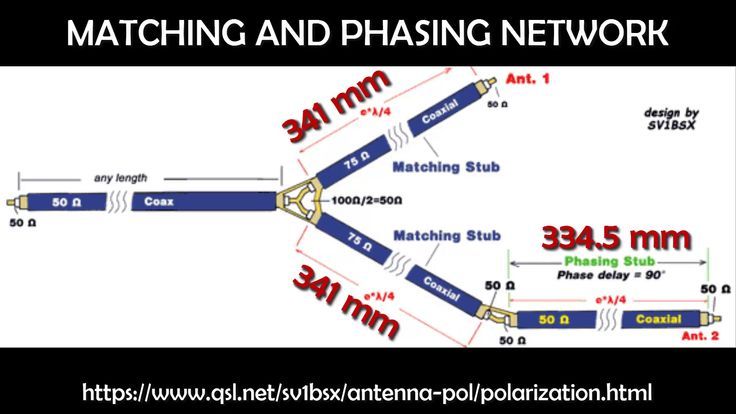
Photo 3
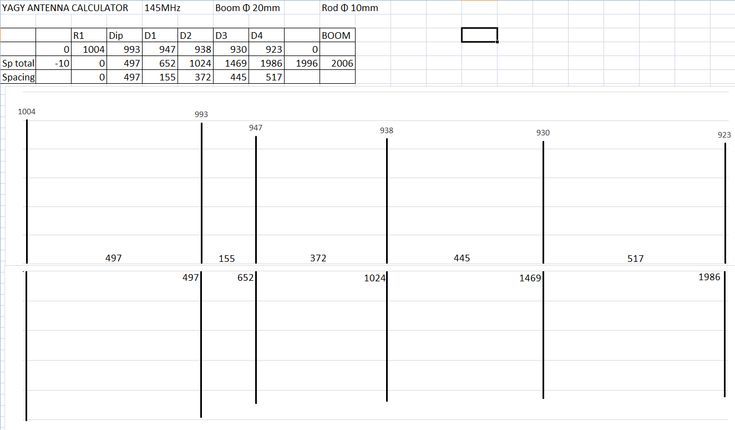
Photo 4
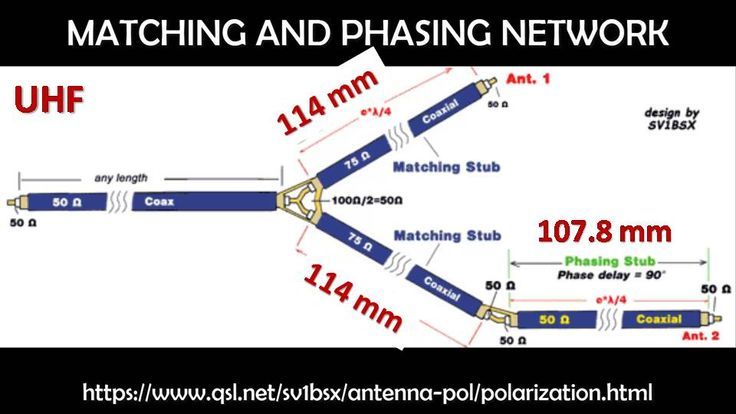
Photo 5
Back to Top -
2 METER, 6 ELEMENT CROSS YAGI ANTENNA
Before we start, I take no credit for this antenna design. I found this excellent YouTube video with great attention to detail online.
Check out this link below of the antenna design with hints and tips to build this antenna project.
There is the full explaination on how this antenna was made on the above youtube link by Viorel Racoviteanu. I have also included the links below, he included in the video with tips and infomation to help making this antenna.
One comment I would make is on the driven elements, I used 10mm tubing for the dipole and the elements on my version of the VHF antenna.Photo 1 shows the picture of the finished VHF antenna by Viorel Racoviteanu.
In photo 2, it shows the lengths required for the VHF phasing and explains about phasing of the two antennas in more detail. (See Link 2.)
Photo 3 shows the VHF 6 element drawing and lengths of each element and spacing on the boom for the 2 meter version.
Photo 4 shows the UHF phasing network and lengths required for phasing the two antennas together.
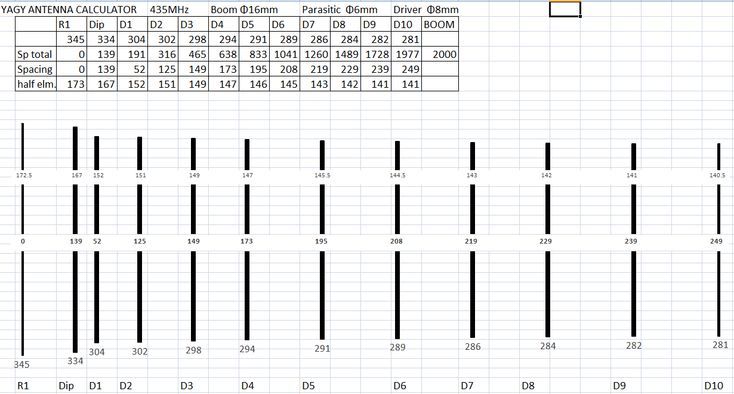
Photo 5 shows the UHF 12 element drawing and lengths of each element and spacing on the boom to make the UHF version of the Cross Yagi Antenna. Simply apply the same methods as the VHF version in the video and links.
Useful links:
Notes on 6-Element Wide-Band 2-Meter Yagis by L.B. Cebik, W4RNL (SK) (See Link 1.)
Antenna Circular Polarization by Mak SV1BSX (See Link 2.)
Yagi Uda Antenna Calculator by www.changpuak.ch based on Rothammel/DL6WU) (See Link 3.)
Coaxial Power Split Calculator by www.changpuak.ch (See Link 4.)
Calculate the extra length of coax feeding the other dipole for circular polarisation by Hartmut DG7YBN/xpol Yagis (See Link 5.)
This shows Viorel's Website with more infomation on things done differently than in the video. (See Link 6)
I hope you enjoy building this project like I have and thanks to all involved for there hard word. Great projects like this is what makes Amateur Radio all about. Enjoy Satellite communication.
© 2024 ~ ZL1RJS