Building Your Own Solar Repeater for Meshcore?
This video above is a lot different to the latest solar light
currently being sold at bunning. It only has one 3,7v battery and
has a small circuit board. Watch the video to show you what to expect
and tips when modifing the solar light.
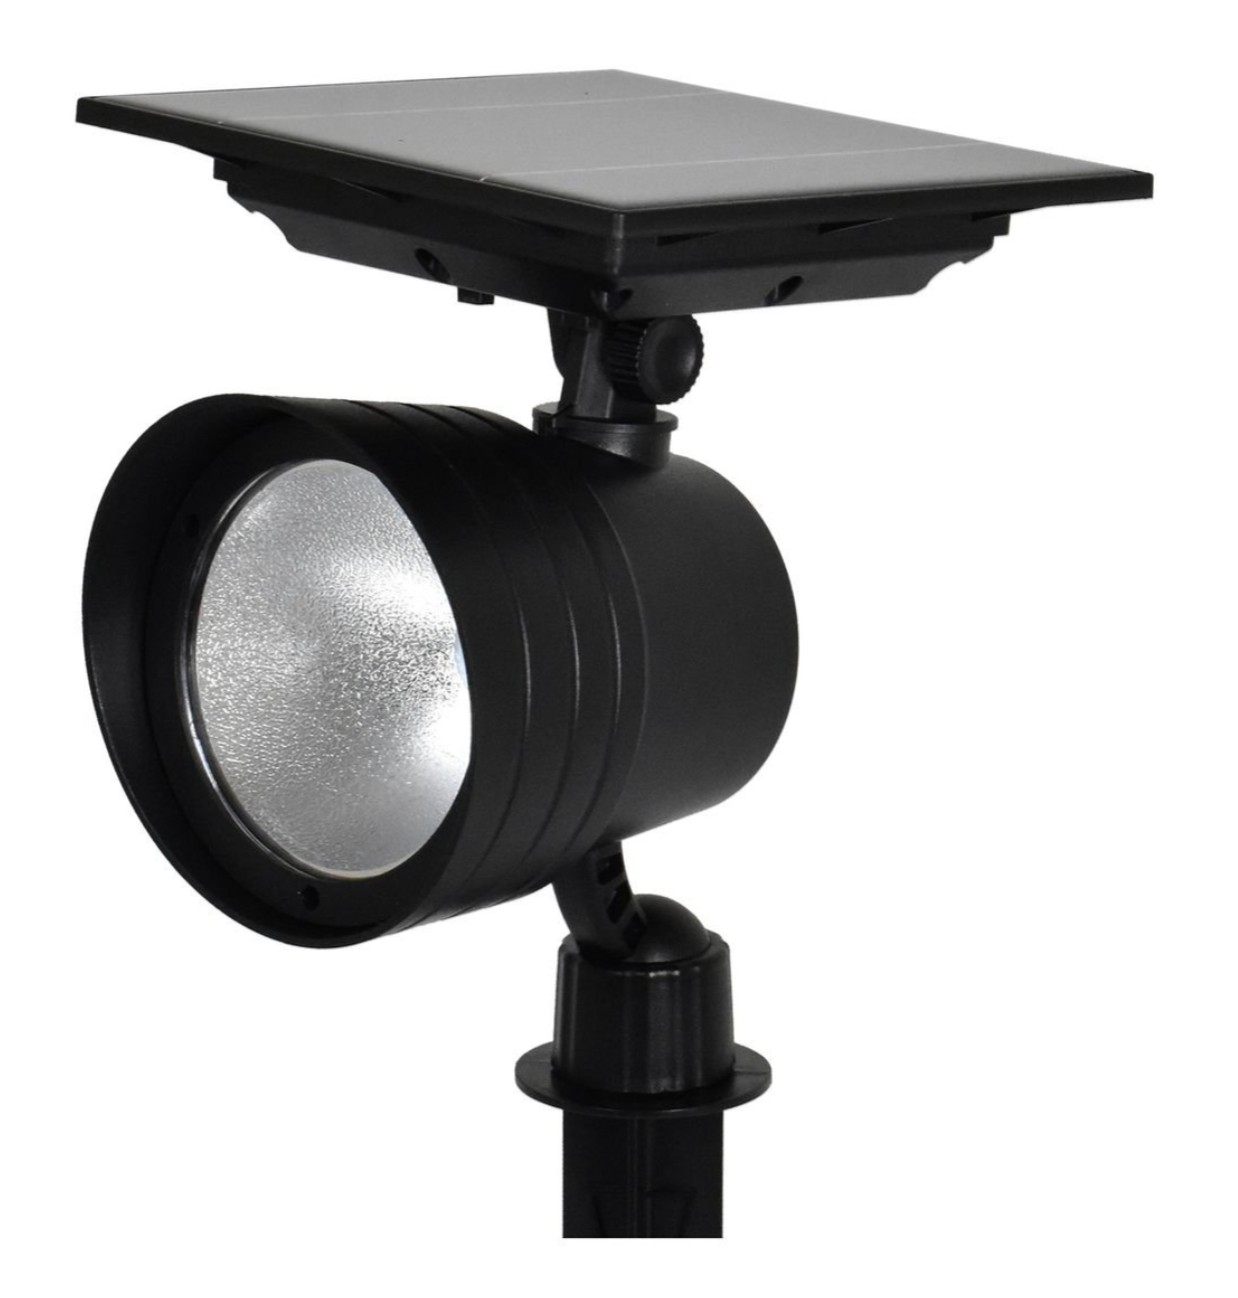 Martin Solar LED.
ASSEMBLY INSTRUCTIONS TO MODIFY THE MARTIN SOLAR LED
Tip
When screwing back into plastic, and this applies to any project,
always turn back the screw until you feel it click and then screw up.
Some screws are self cutting and if you don't turn back the screw
half a turn or until it clicks, then it can strip the thread and
damage your case.
Modifing the Martin Solar LED
I will be showing you how to modify this martin solar LED.
We will not be using the LED light part, just the solar panel and
will be installing XIAO nRF52840 & Wio-SX1262 kit inside and behind
the solar panel.
There are a few different solar lights to choose from but the price
also increases, and the one I am currently playing with is the Martin
Solar LED by Click.
I/N: 0266524 and the cost is $29
It uses two 3.7v 18500 1500mAH batteries.
It also has a 6" x 6" Solar panel.
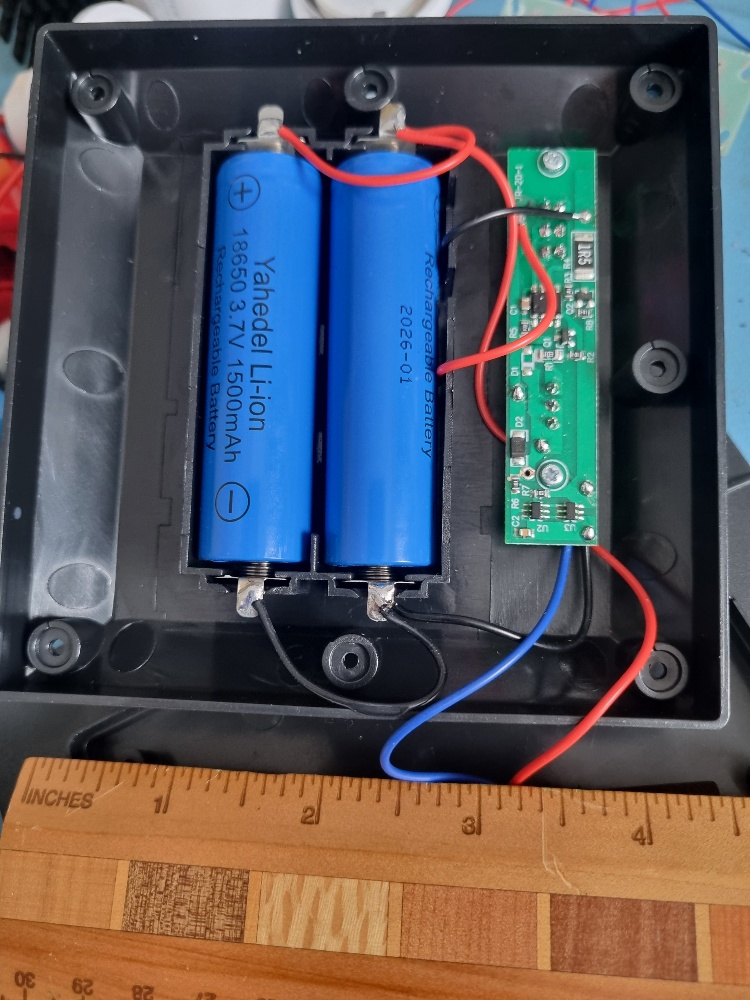 Inside the Unit.
When you remove the back cover, take out the two batteries to remove
any power off the unit.
You will need to drill a hole for the external antenna and modify the
original charge circuit board so that the XIAO unit when fitted will
have power during the day.
Once I go deeper into the circuit, I will post some more information
on how to modify it etc.
When the solar panel charges during the day, the circuit board
detects voltage from the solar panel and the circuit turns off the
output as this was designed to only turn on at night, so it will need
a modification to keep it at 3.7v constant.
Purchase XIAO nRF52840 & Wio Kit
Adding the Power to the XIAO PCB
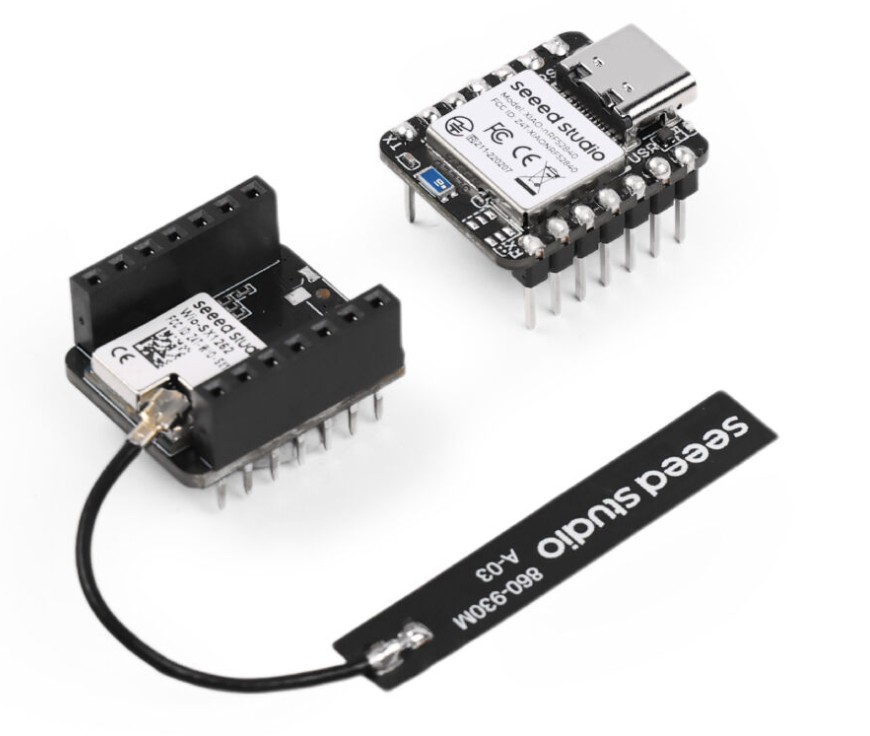 XIAO nRF52840 & Wio-SX1262 Kit.
This is the XIAO kit, You will need to disconnect the antenna as we
will not be using this and will be fitting an external antenna that
you will need to buy.
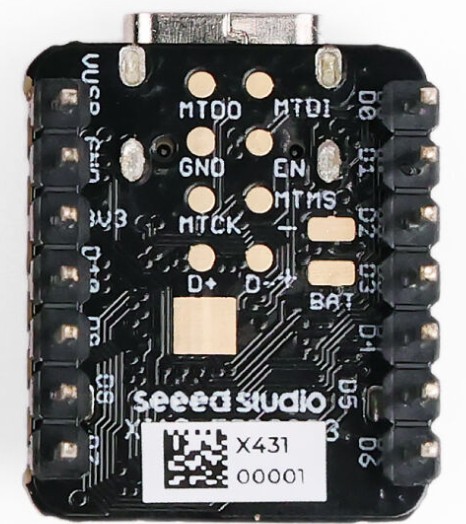 XIAO Underneath Power Connections.
Before you separate these boards, pay attention to which way round
the board fits together. I used a marker pen and marked one side so
you put it back together correctly. Take a photo or remember the
little antenna connection is on the opposite side to the USB connector.
You need to separtate the board to solder the power connections to
this board, you can see the "BAT" + & - connections.
We will be soldering two wires to these positive and negative pads.
This will be the power in to power up the board.
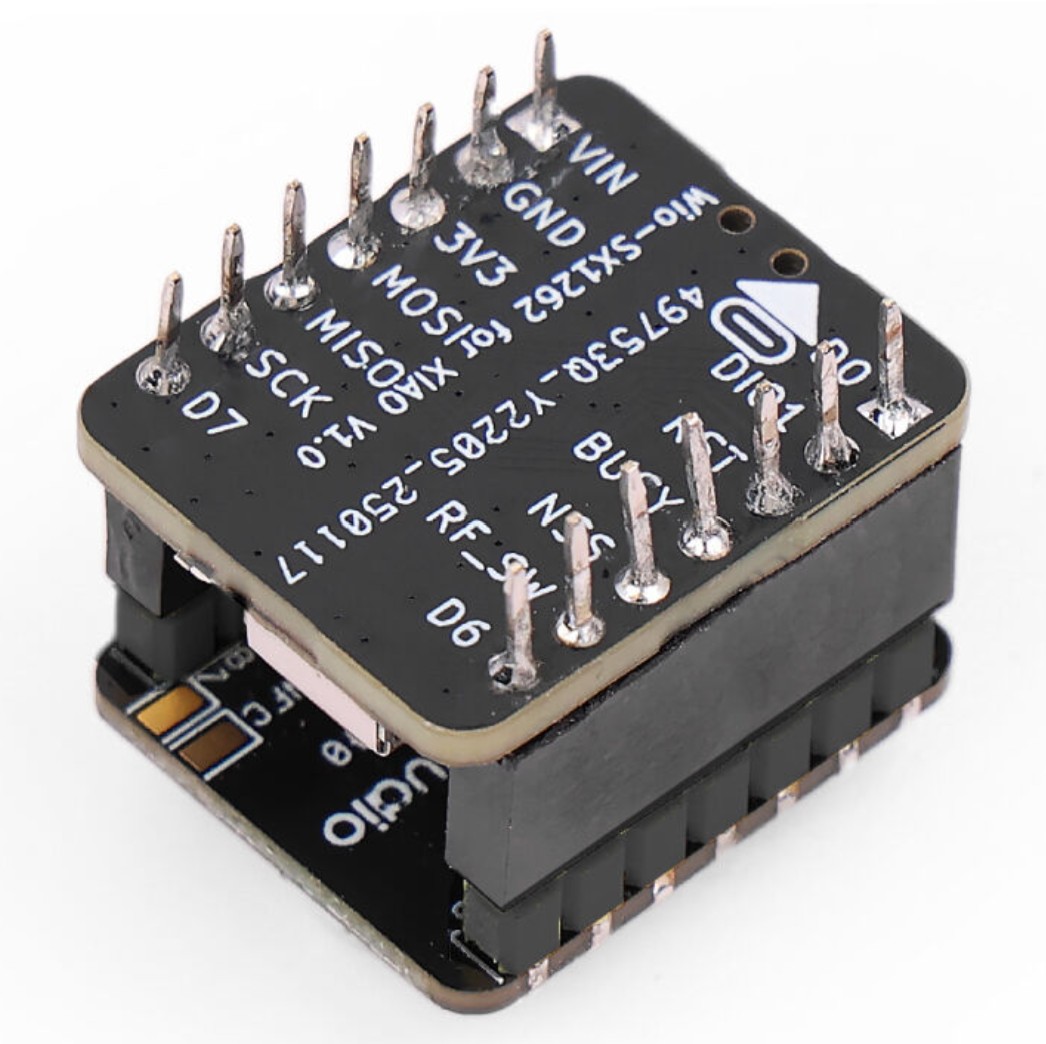 Underneath Pin Connections.
Cut these pins off as they are not required. Once done put a small
piece of double sided tape onto the PCB.
Peel off the backing after the power connections have been soldered
to the PCB and the antenna connected, stick in place, as shown in the
finished photo below.
The Finished Meshcore Solar Panel
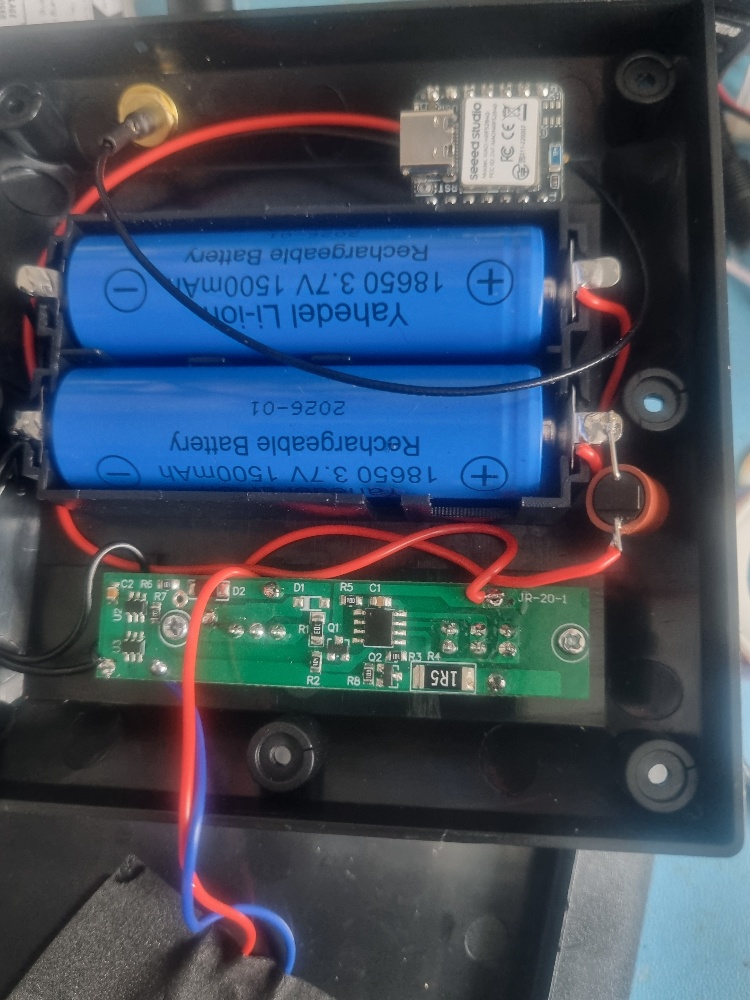 Finished Unit.
The red and black wires that went to the LED light, the output of the
black wire needs to be unsolded from its current position and moved
to the negative of the battery.
If you do not remove the output black wire from the 100R SMS resistor
and refit to the same point where the black wire comes in from the
battery, then during the day you will have no power on the XIAO unit.
I also recommend that you fit a 2A fuse in the positive side. I
removed the red wire off the battery holder and soldered the fuse
inline, as seen in the photo.
This is just for protection, if something was to short out.
I soldered the output, black wire on to the PCB where the other black
wire is coming from the battery connection.
The output of the red wire stays where it is, the on/off switch still
works and will turn on the XIAO unit and if it is in the off position,
the batteries will still be charged while the unit is switched off.
Before you reconnect the batteries.
Make sure the power switch is in the OFF position and the antenna is
connected.
The 100, 200 & 300 lumins switch is in the 300 position. I don't
think this matters too much as this part of the circuit is not being
used anymore.
In the 300 lumin position the panel will give the maximum voltage
from the panel.
Optional
If you wanted to add a power LED that only comes on at night the you
can add a LED and resistor to the red positive output wire and
negative output wire to the 100R resistor.
If you do this then, make sure the current drain is low otherwise it
will drain the battery.
Programming the XIAO nRF52840 Meshcore Repeater
Watch this YouTube video on how to program the unit, You just need to
select the "Seeed Studio XIAO nRF52 Wio"
All Assembled Solar Panel Meshcore Repeater
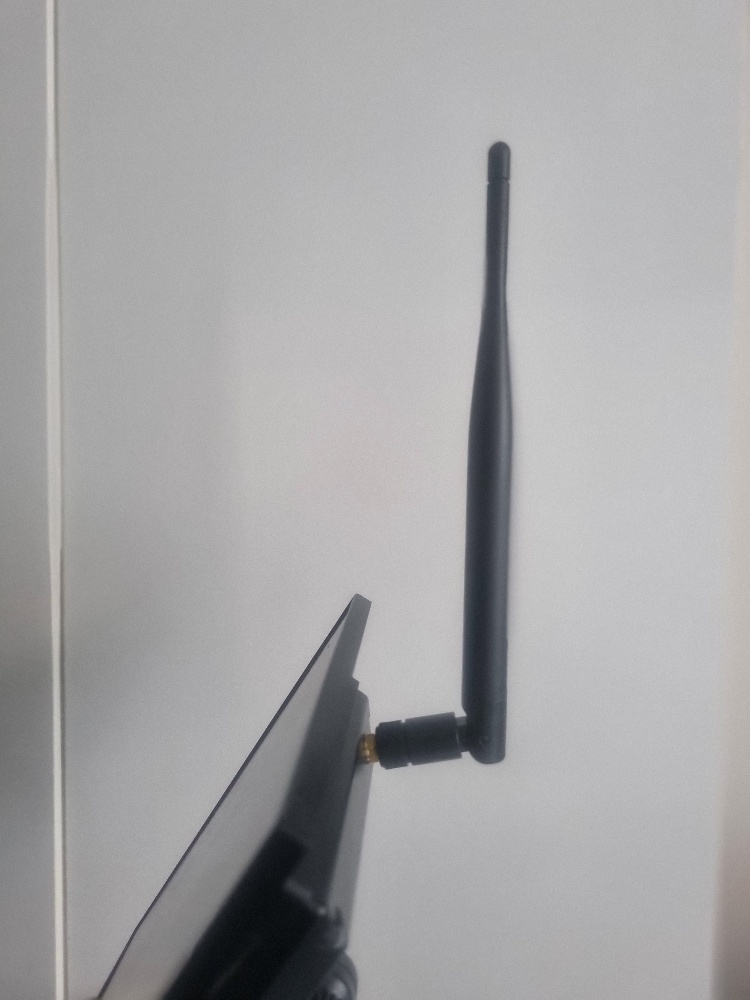 Assembled Unit.
Once you have it all working and ready to go outside, make sure you
have sealed up any holes. I used amalgamation tape to seal it up and
liquid tape.
I also recommend that you fit a breather valve at the bottom of the
case as a drain, to let any moisture/water out, if water was to get in.
Also to allow heat expansion, if you watched any of the videos, you can
add a foam backing foil to refelect as much heat away from the
electronics and batteries.
I have found several YouTube videos on the guys channel below so be
sure to take a look at them to get more ideas.
I have not seen them all yet, so I cannot comment at present.
