Meshcore Companion or Room Server using the Seeed XIAO NRF52840
If you have access to a 3D printer, you can print out a case to make
either a companion or room server that works in conjunction with your
phone via bluetooth.
Check out the link below to Printables.com
All the details are in the
link below to get the parts. All the parts come from aliexpress.com
to assemble one of these units.
Parts List
ASSEMBLY INSTRUCTIONS
After printing the case, assemble the parts. Start by fitting the
battery connectors.
Fitting of the Battery Terminals
Install the female battery connector (+) and solder the red wire to
the female connector terminal pad. Trim any excess and pay attension
on which side to solder the wire so it mages it easier to slide and
fit into the slot.
To push it into the slot, you may need to use a small piece of wood
or a something solid to help push it in, making sure the the wire and
pad is clear when inserting.
Don't use you fingers... to avoid cutting them!
Do the same and follow the same instructions for the negative black
wire, trim to fit and solder it to the springs terminal pad (-).
The battery treminals should now be done. This wire will go to the
(-) side of the XIAO.
Do NOT fit the battery yet. This is the last step to fit the battery,
once you check that the antenna is installed.
NOTE: If the antenna is not connected when you power up the
XIAO it can cause damage to the unit.
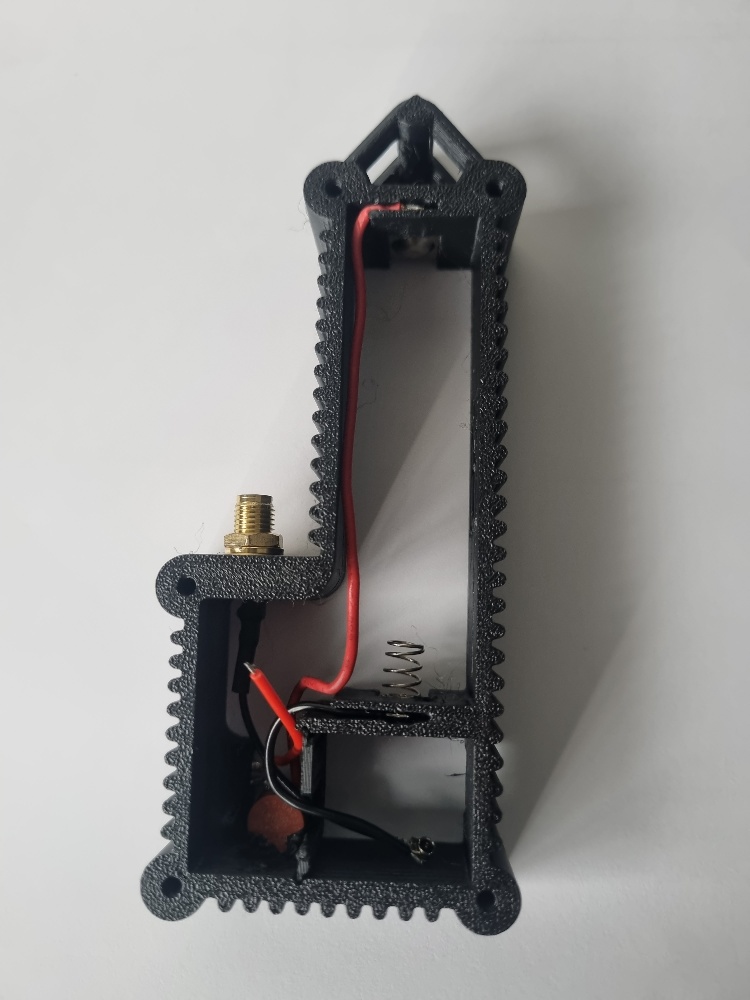 Shell + Wiring.
Fitting the 2mm On/Off Switch
The switch has 6 pins, you will need to cut off 2 pins to make it fit
into the case. I linked the pins together so that the switch is using
both sides of the switch.
(See the close up of the assembled unit
below) (The switch in the picture is showing that the unit is On)
I added a 2A fuse on one side of the switch and the other side of the
fuse goes to the red wire from the battery. You can slide a bit of
heatshrink up the red wire and back over the fuse connection when
done.
The other side of the switch will go to the (+) side of the XIAO
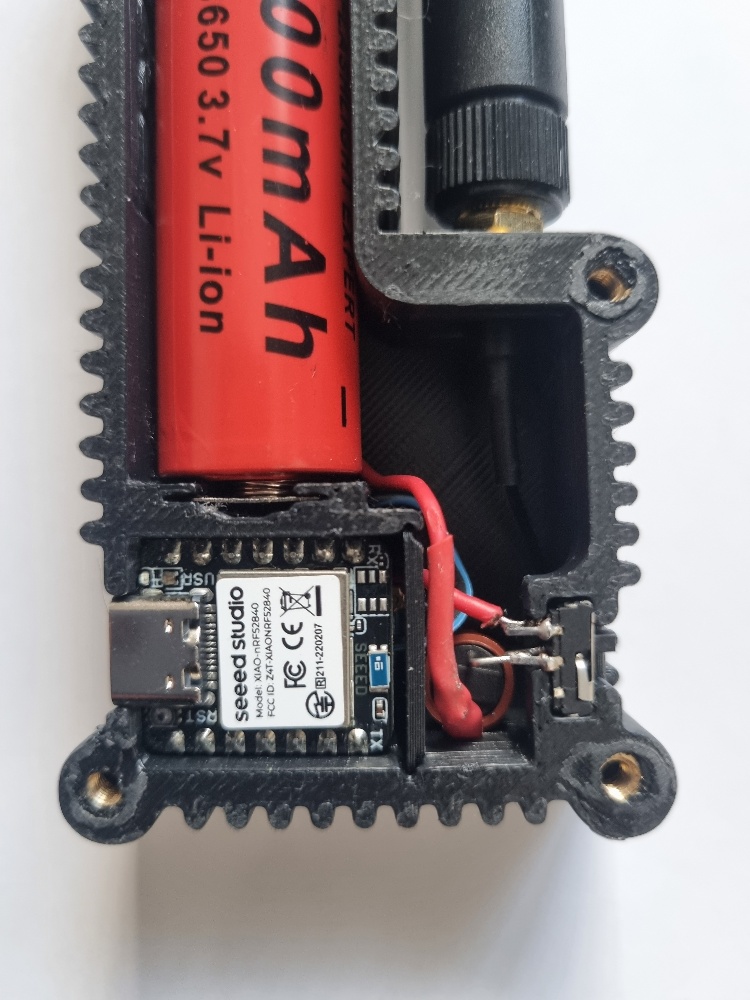 Close-Up of Assembled unit.
Fitting the Antenna to the Case
This case will fit antennas up to 13mm in diameter, and if required,
it has a lanyard attachment at the top .
When you buy this connector cable, it comes with the nut,grip
washer and spring washer.
Fit the SMA connector into the case.
NOTE:
Before you fit the washers, etc, check and make sure the IPX
connector is facing the correct way (downwards), so it will have no
stress or that you have to twist the connector and cable to get it
to fit onto the XIAO board.
As the case has been designed to hold the
connector from turning, push and turn to align the connector so the
IPX is NOT under any stress when you put this in.
This is done in case the unit has any bumps, the IPX connector will
not accidently come off the XIAO board, and damage the unit.
The grip washer has a curve on it, this goes face down so it grips
into the case. Next the spring washer then the nut, and tighten up.
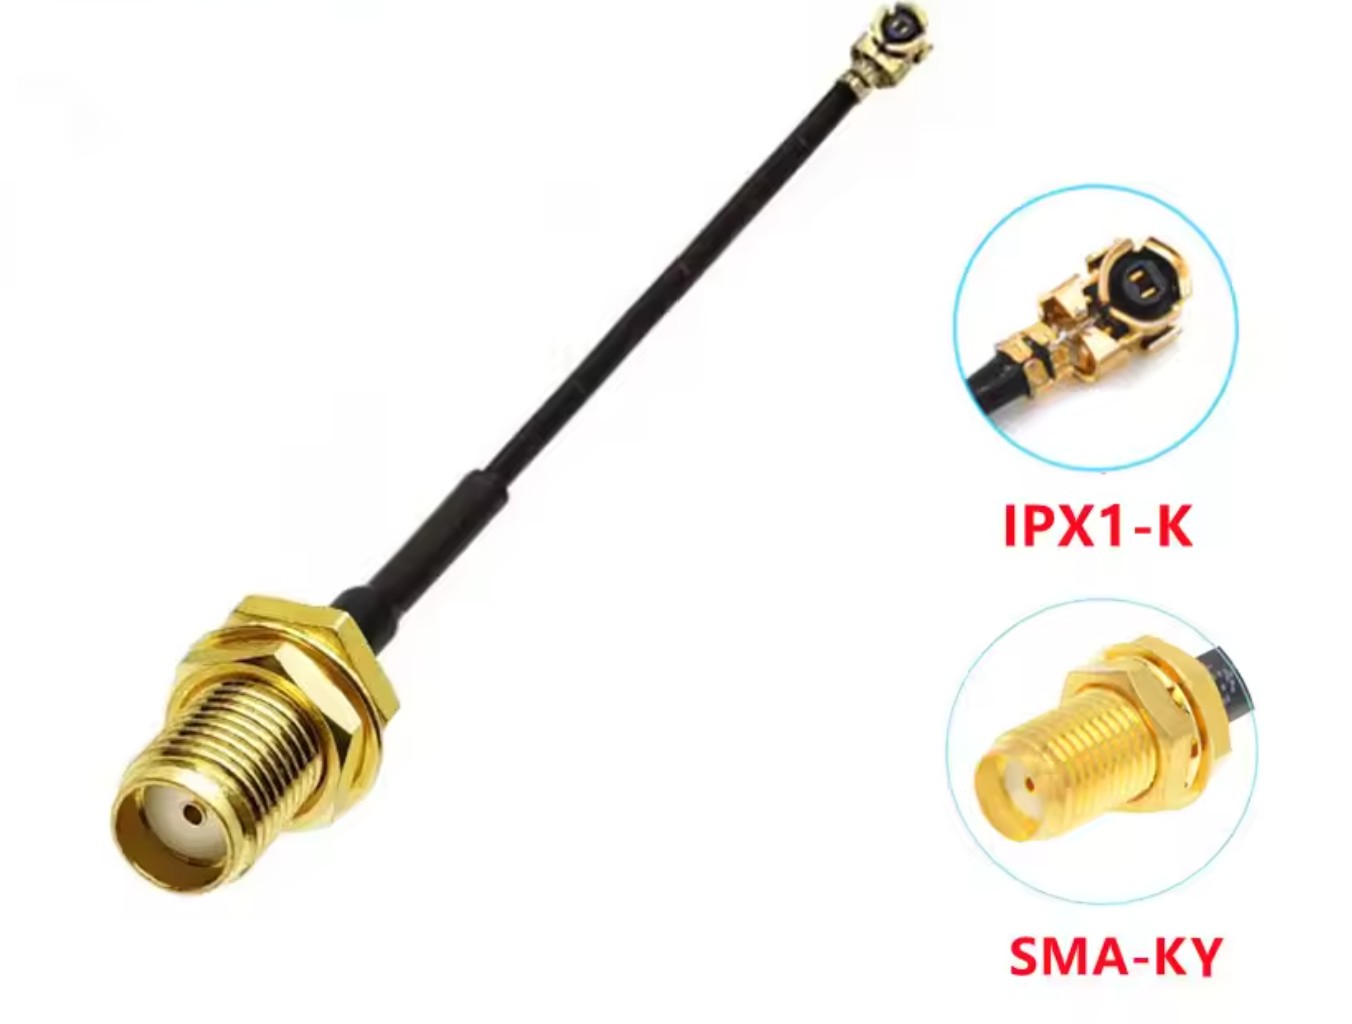 SMA to Ibx Connector.
Fitting the Power to the XIAO nRF52840
You should now have two wires, red and a black and a IPX connector
waiting to be fitted.
You can trim the wires so that the red and black wires are the same
length. Don't cut these too short.
The black wire will solder onto the negative
(-) terminal.
The pads are located underneath the bottom of the
NRF52840 board, you will need to seperate the two boards of the XIAO.
When separated the IPX connector and the USB C connector are opposite
to each other, when you reconnect them.
Solder the red (+) and black (-) leads to the XIAO (see the XIAO
underneath power connections picture in the repeater build above.)
Refit the XIAO boards together and fit the IPX antenna connector.
Assemble it back into the case and make sure it is all snug and will
not cause any problem.
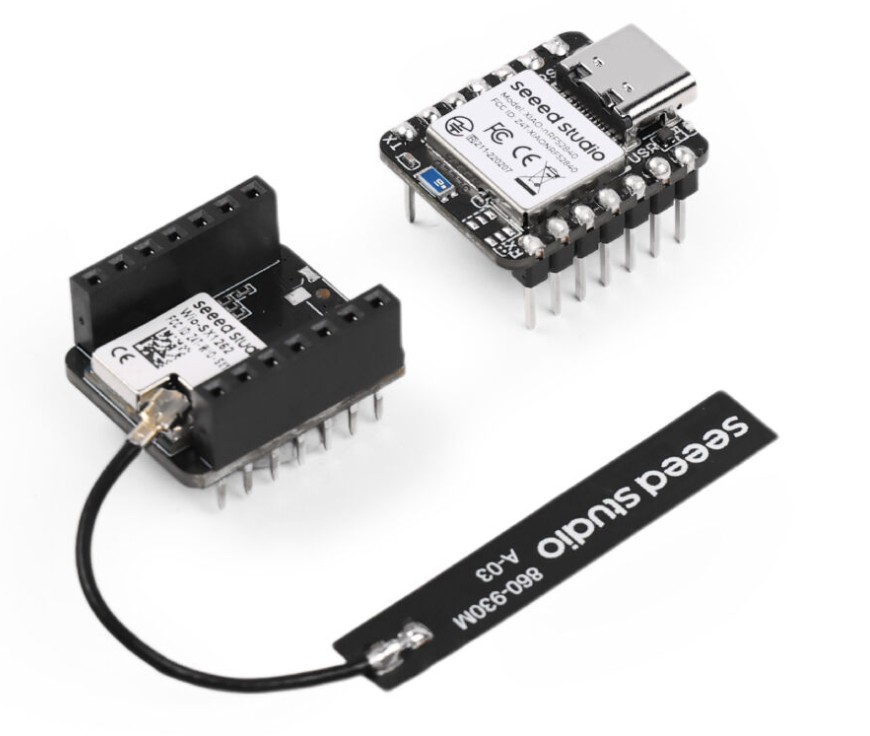 XIAO nRF52840 & Wio-SX1262 Kit.
This is the XIAO kit, You will need to disconnect the antenna as we
will not be using this and will be fitting an external antenna that
you will need to buy.
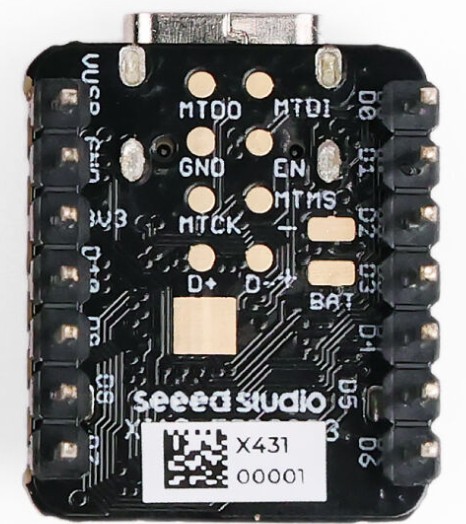 XIAO Underneath Power Connections.
Tip
XIAO Underneath Power Connections.
Tip
As you need to separtate the board to solder the power connections to
this board, you will see the "BAT" + & - connections.
Before you separate these boards, pay attention to which way round
the board fits together. I used a marker pen and marked one side so
you put it back together correctly.
You can take a photo or remember the IPX antenna connection is on
the opposite side to the USB C connector.
We will be soldering two wires to these positive and negative pads.
This will be the power in to power up the board.
Fitting a Battery Managemant System (BMS) to the Battery
As the Xiao does not have a BMS on board, we need to add a BMS to
protect the battery.
This can prevent the battery from over-discharge
below 2.5v and overcharging, typically around 4.2v in lithium-ion
batteries.
The BMS is essential for safe battery charging, it acts as the
"brain" optimizing performance while protecting against thermal
runaway, which could otherwise damage the battery or cause fire
hazards.
Fitting a BMS will prevent the battery from discharging altogether
and cut out at a safe voltage as to protect the battery.
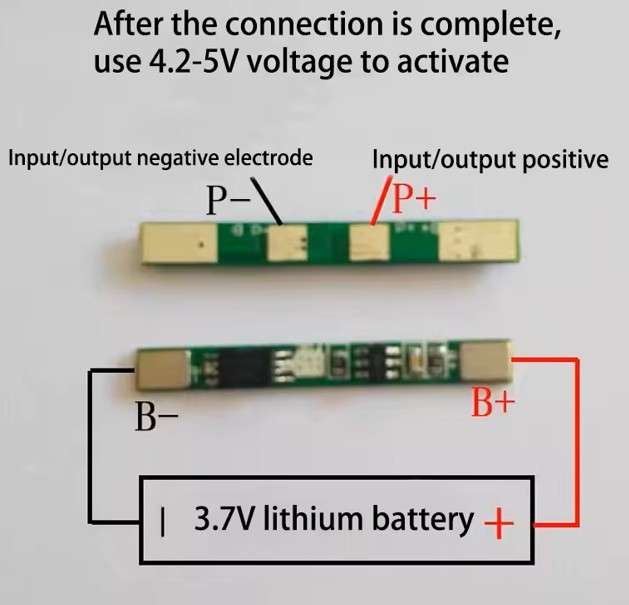 BMS Wiring Diagram.
Installing the BMS
The BMS is small and can go in and fit alongside the battery.
As this BMS was added afterwards, I cut the red battery lead and
soldered both wires on the PCB. Battery to
B+ and the other
side of red wire (from the ON/OFF switch) to
P+.
Next, I removed the negative wire off the Xiao which is comming from
the battery and soldered that to a 2A fuse and the other end of the
fuse to the BMS
B-.
I fitted a new negative wire back onto the Xiao, and the other end
went to the BMS
P-.
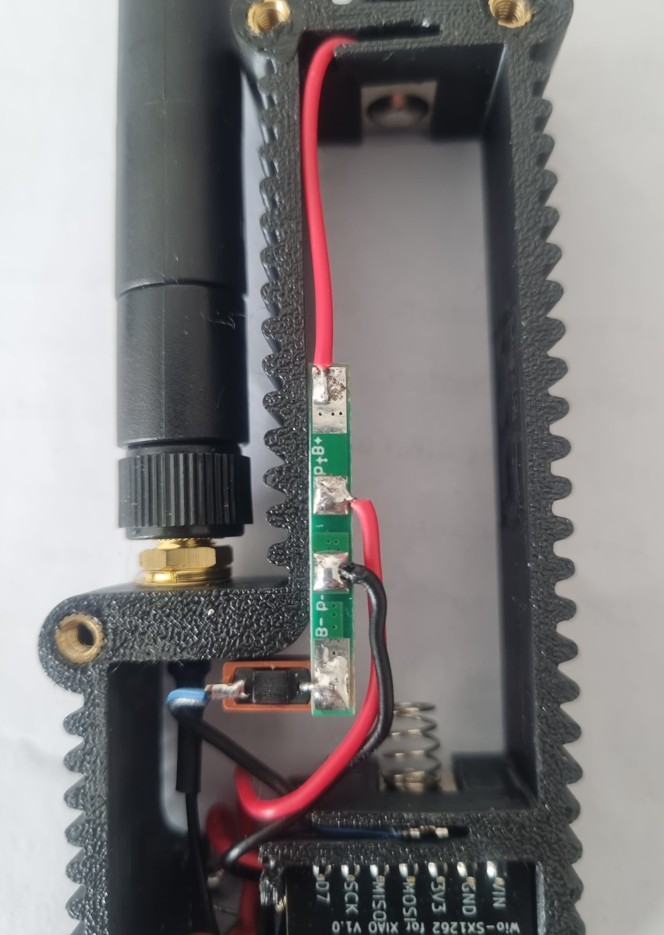 BMS Installed without Battery.
You may see that I have added another 2A fuse which is in series with
the battery.
It was intended to be in the positive side, but I cut
the wire from the battery shorter, so I put the fuse in the negative
side, which will still work in case of any problem or shorts.
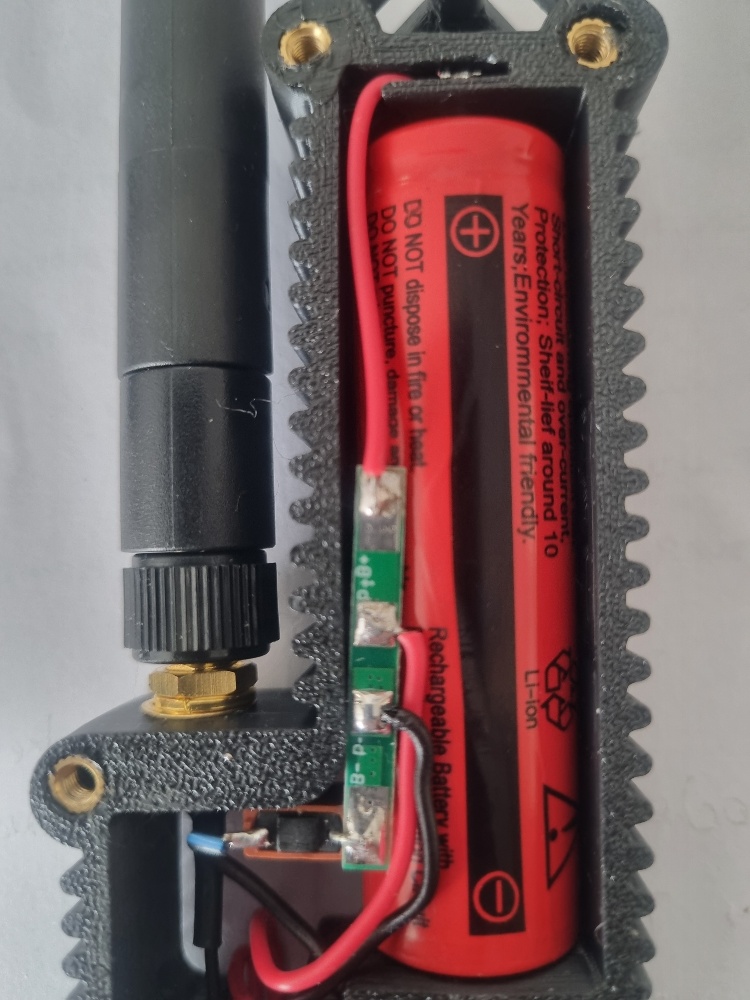 BMS Installed with Battery.
NOTE: Check the antenna to make sure it is still connected, if this
has been a modification add-on.
Fitting the Battery
Before you finally connect up the battery, check your work and that
the antenna is still connected and the unit is switched Off.
Fitting the Covers to the case
I drilled a 1mm hole on the Mesh Core cover in the recessed part of
the letter C so you can see the LED inside the case of the XIAO.
You can use the recommended screws to fit the covers on.
10x M3 5mm screws. The inset holes are 6mm for the screw heads.
In the photo you will see that I used the brass inserts. I did this
on both sides but it was quite hard to align, so use the recommended
screws above, but up to you...
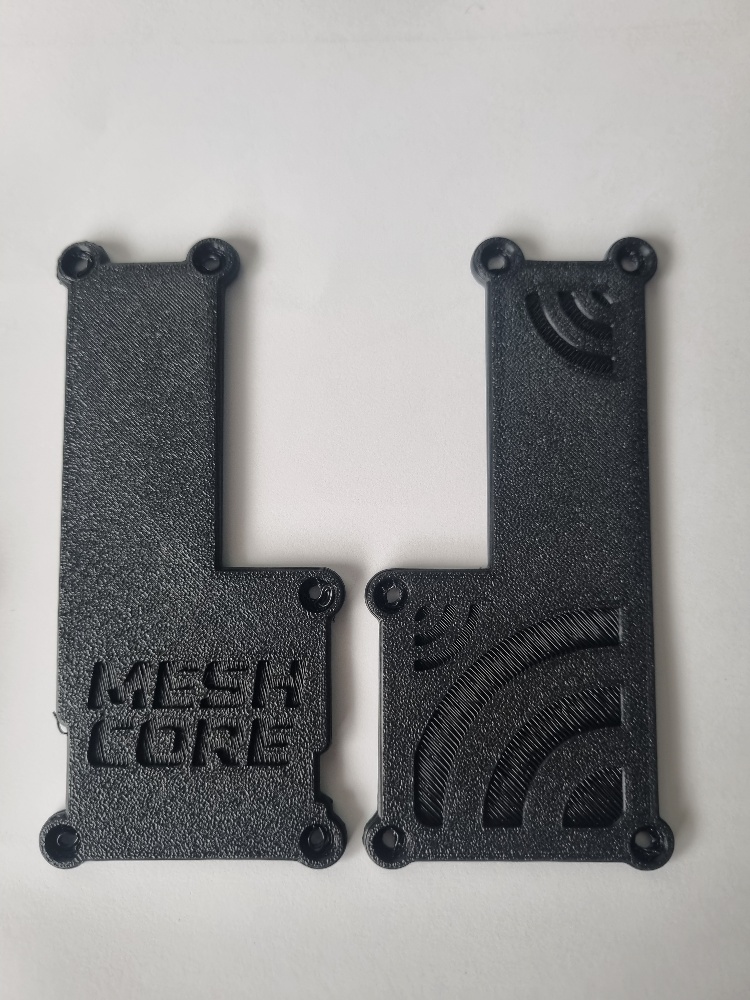 Side Covers.
Charging the Battery
Use the USB C port to charge the battery.
Programming the XIAO
To program this XIAO, visit the Meshcore website
https://meshcore.io/ or on
this link below.
Meshcore Website
You will need a computer to program the unit.
Depending on what you are wanting this unit to be, either a room
server or companion, use the website to navigate to your choice.
If you need more info on how to do this, look at my link here.
This will be the same set-up procedure except use the room server or
companion. Enjoy...
Completed Unit with the Covers Off
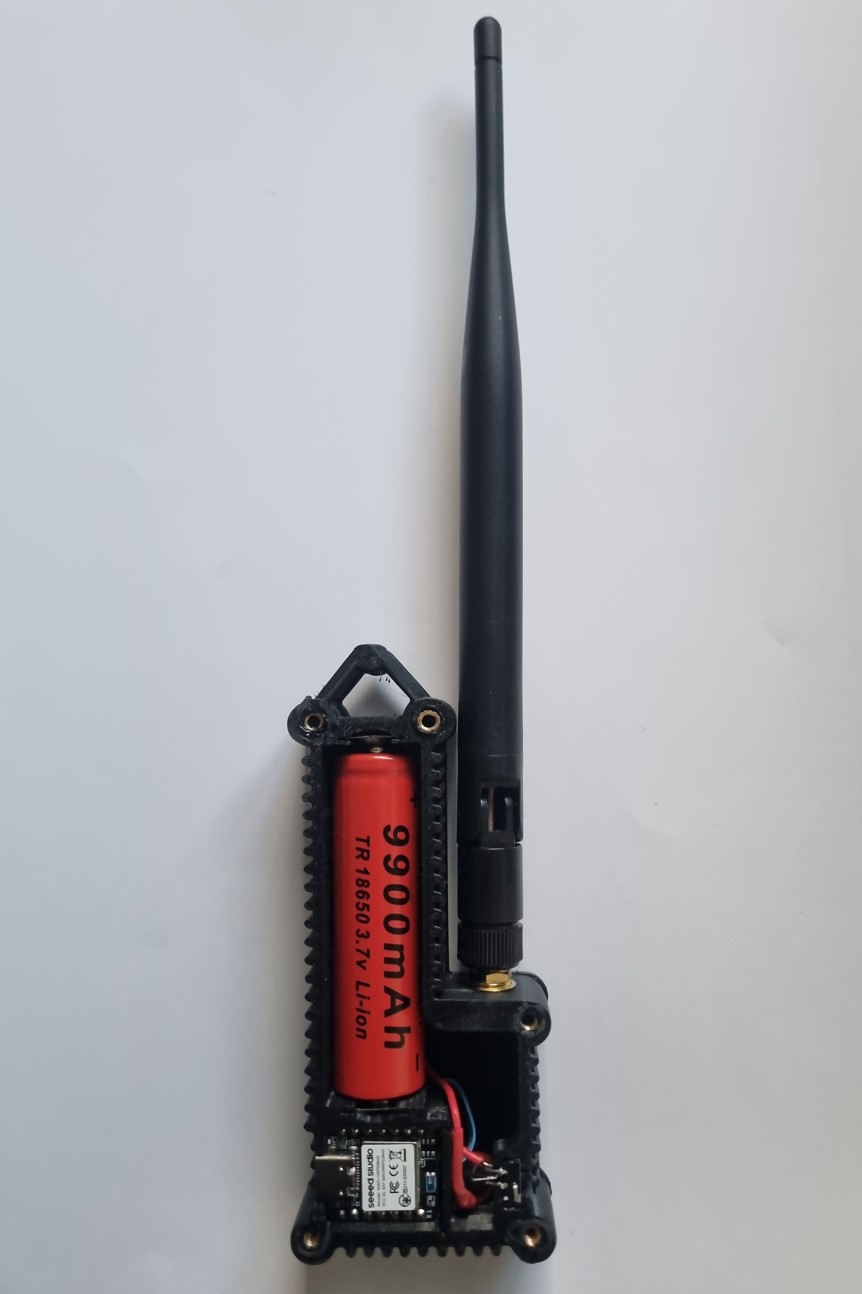 Assembled Unit with the Covers Off.
